 |
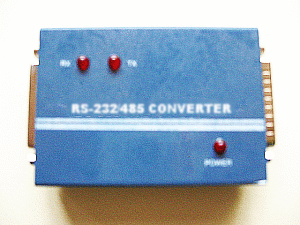
| RS232/RS485 PHOTO ISOLATOR CONVERTER | |
|
|
| Product Code : A485CONV/E(U) |
|
The RS232 to RS485 photo
isolator provides a RS232 signals to RS485 signals conversion features,
which are used to expand long haul communication distance via
multi-drop communication of RS485 signal, and it allows the input
signals to be completely prevent up to 1000V. There are 3 LED
indicators correspond to Tx, Rx, and power signals. A 9V, 500mA power
adapter is provided in the package.
|
||||||||||||||||||||||||||||||||||||||||||
| |
||||||||||||||||||||||||||||||||||||||||||
| The features of RS232 to RS485 photo
isolator are : |
||||||||||||||||||||||||||||||||||||||||||
|
||||||||||||||||||||||||||||||||||||||||||
| |
||||||||||||||||||||||||||||||||||||||||||
| Check that your RS232 to RS485 photo isolator package includes the following items : | ||||||||||||||||||||||||||||||||||||||||||
|
||||||||||||||||||||||||||||||||||||||||||
| |
||||||||||||||||||||||||||||||||||||||||||
| Hardware configuration: | ||||||||||||||||||||||||||||||||||||||||||
| The on board
jumpers can be used to set flow control and delay time. |
||||||||||||||||||||||||||||||||||||||||||
|
JP1
(Jumper 1) Set GND photo isolator. JP2
(Jumper 2) Set +5V photo isolator. JP3
(Jumper 3) Set RTS photo isolator. JP4
(Jumper 4) Set RX photo isolator. JP5
(Jumper 5) Set TX photo isolator. JP6 (Jumper 6) Select flow control. JP7 (Jumper 7) Select delay time when auto flow control is set VR
|
||||||||||||||||||||||||||||||||||||||||||
  |
||||||||||||||||||||||||||||||||||||||||||
| 1. Set GND
isolator JP1  The JP1 is used
to set GND isolator. When short pin 1 and pin 2 means disable GND
isolator (the input & output of DC converter are connected
together), otherwise, GND is isolator. This jumper is used for testing
only; in general you must open it.
This Jumper For
Test use only you must Open
it
2. Set +5V Power isolator JP2  The JP2 is used to set +5V power isolator. When short pin 1 and pin 2 means disable power isolator (the input & output side use the same +5V power), otherwise, photo isolator is set (the input & output side use the different +5V power). This jumper is used for testing only; in general you must open it.
This Jumper For
Test use only you must Open
it
3. Set RTS photo isolator JP3  The JP3 is used to set RTS photo isolator. When short pin 1 and pin 2 means disable RTS photo isolator, otherwise, photo isolator is set. This jumper is used for testing only; in general you must open it.
This Jumper For Test use
only you must Open
it
4. Set RX photo isolator JP4  The JP4 is used to set RX photo isolator. When short pin 1 and pin 2 means disable RX photo isolator, otherwise, photo isolator is set. This jumper is used for testing only; in general you must open it.
This Jumper For Test use
only you must Open
it
5. Set TX photo isolator JP5  The JP5 is used to set TX photo isolator. When short pin 1 and pin 2 means disable TX photo isolator, otherwise, photo isolator is set. This jumper is used for testing only; in general you must open it.
This Jumper For Test use
only you must Open
it
6. Select auto flow control JP6  The JP6 is used to set auto flow control. When short pin 2 and pin 3 means auto flow control, user only need to send data from Tx signal, the hardware will control RTS signal automatically. When short pin 1 and pin 2 means RTS flow control, while user need to send data, it needs to set RTS signal to 1, to enter driver mode, then send message or data. After sending message, it needs to set signal to 0 to enter receive mode again.
7. Select delay time JP4  The JP7 is used to set maximum delay time when auto flow control is set. To short pin 3 and pin 4 means maximum delay time is 4.6 ms, and short pin 1 and pin 2 means maximum delay is 40 ms. To adjust maximum delay time, please adjust VR.
4. VR The VR is used to adjust maximum delay time. Please use the software in the shipping package to adjust it. |
||||||||||||||||||||||||||||||||||||||||||
| RS485
Cabling Information for DB25 The RS485 signal assignment is shown as follows.
The RS485 communication is based on cable sharing method, which is connected as following:
RS232 Cabling Information for DB25 The communication
interface follows the EIA RS232 standard. The signal assignments
for a standard DB25 connector are shown below:
|
||||||||||||||||||||||||||||||||||||||||||
| Download Test Support |
||||||||||||||||||||||||||||||||||||||||||
Information |