| Please Consult To
Jumper And Switch Setting |
|||||||||||||||||||||||||||||||||||||||||||||
JUMPER SETTING |
|||||||||||||||||||||||||||||||||||||||||||||
| The seven
jumpers on the PC COM RS422/RS485 adapter must be configured correctly
in accordance with the operating system you are using. JP1
(Jumper 1)
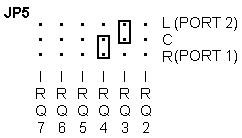
Select driver enable mode of channel 1. JP2 (Jumper 2) Select driver enable mode of channel 2. JP3 (Jumper 3) Select receiver enable mode of channel 1. JP4 (Jumper 4) Select receiver enable mode of channel 2. JP5 (Jumper 5) Select which interrupt will be used in the range IRQ2 though IRQ7. JP6 (Jumper 6) Select
number of delay wait states.
JP7 (Jumper 7) Determines the address of the UARTs [I/O address].. |
|||||||||||||||||||||||||||||||||||||||||||||
| |
|||||||||||||||||||||||||||||||||||||||||||||
| Selection
of Jumper Settings It is important to
refer to the user manual supplied with your operating system to
determine the correct configuration.
IMPORTANT: CARE MUST BE TAKEN IN SELECTING THE CONFIGURATION OF JUMPERS TO ENSURE YOU DO NOT DUPLICATE SETTINGS OF OTHER EQUIPMENT ALREADY INSTALLED IN YOUR COMPUTER. DUPLICATION OF SETTINGS WILL RESULT IN A MALFUNCTION OF ONE OR BOTH DEVICES. Please refer to the following settings for each jumper block. If you are installing more than one board, do not duplicate jumper settings for any parameter. |
|||||||||||||||||||||||||||||||||||||||||||||
The JP7 is
used to select the I/O port address. The I/O address mapping of each is
shown below.
Factory setting is in mode 1 which are standard COM1: and COM2:. |
|||||||||||||||||||||||||||||||||||||||||||||
|
|||||||||||||||||||||||||||||||||||||||||||||
|
|||||||||||||||||||||||||||||||||||||||||||||
a. Always enable.
This is required to set the always enable mode for RS422 applications. b. Enabled by RTS signal. When the signal is 1, the driver is enabled, otherwise when the signal is 0, the driver is disabled. To turn on the driver for RTS, you only need to output 3 to the address of base address plus 4. c. Enabled by bit 0 (LSB) of control register The address of control register is base address plus 7. When the bit is set to 1, it enables the driver, otherwise when the bit is set to 0, it turns off the driver. The driver mode selection of channel 1 is shown below.
Short JP1-1: driver always enabled. Short JP1-2: enabled by RTS. Short JP1-3: enabled by bit 0 of control register. The driver mode selection of channel 2 is shown below.
Short JP2-1: driver always enable. Short JP2-2: enabled by RTS. Short JP2-3: enabled by bit 0 of control register. |
|||||||||||||||||||||||||||||||||||||||||||||
JP3 and JP4 are used to select
the receiver enable mode of channel 1 and 2 respectively. There are two
enable modes:
a. Always enable.
b. For RS422 applications, setting to "always" enable is required. c. Enabled by bit 1 (LSB) of control register The address of control register
is base address plus 7. When the bit is set to 1, the receiver is
enabled, otherwise when the bit is set to 0, the receiver is turned off.
The receiver mode selection of channel 1 is shown below.
Short JP3-1: receiver always enable. Short JP3-2: enabled by bit 1 of control register. The receiver mode selection of channel 2 is shown below.
Short JP4-1: receiver always enable. Short JP4-2: enabled by bit 1 of control register. |
|||||||||||||||||||||||||||||||||||||||||||||
NEXT
|